
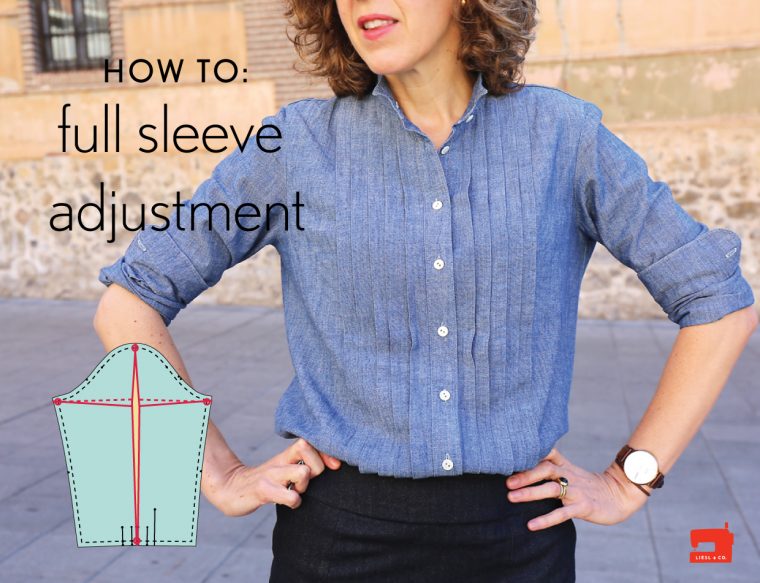
how to do a full sleeve adjustment
When you're trying out a new sewing pattern for the first time, there's often a bit of tweaking involved to make it just right for your personal style or body type. That's why making a muslin is such a great idea! At Liesl + Co., we aim to make adjustments easier by offering patterns in multiple cup sizes, but there are still plenty of ways to customize a pattern to better suit you.
One fairly common adjustment involves the sleeves. If a sleeve feels a bit snug—whether it’s around your arms or just doesn’t match your preferred fit—you can easily alter the pattern to create more room. In this quick tutorial, I’ll guide you through the process step-by-step. It’s simple and won’t take long at all!
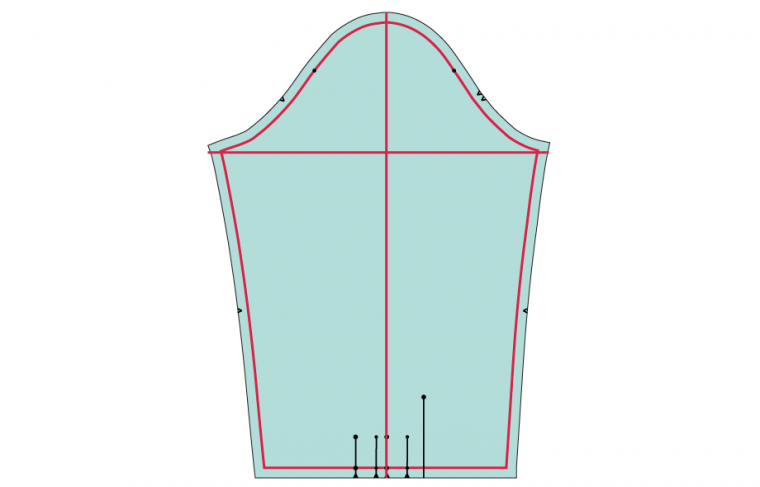
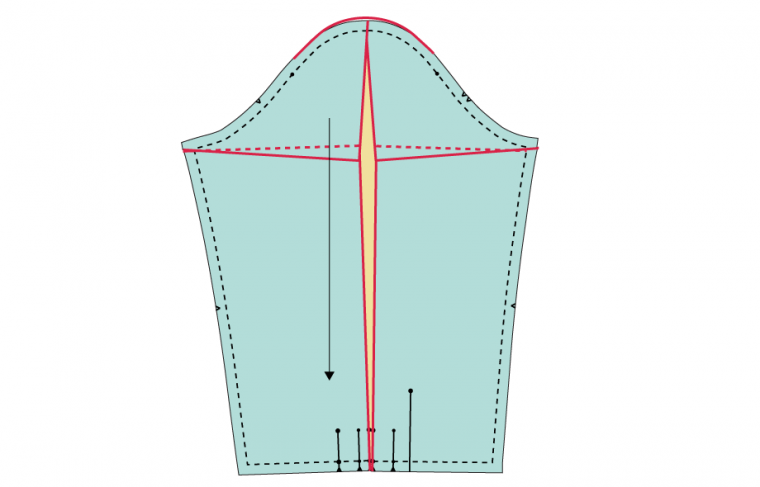
**Step 1:** Begin by marking the seam lines on the pattern piece you wish to modify. This ensures you can adjust the pattern without affecting the actual length of the seams. On Liesl + Co. patterns, the seam allowance is typically 1/2". Below, you'll see a red line indicating the seam line I've drawn. After drawing the seam lines, add a horizontal line that crosses the seam lines at the underarm area. Then, add a perpendicular line intersecting the center of the sleeve cap. The sleeve cap may not be perfectly centered since the back of the sleeve is often longer than the front, but don't worry—just estimate as best as you can.
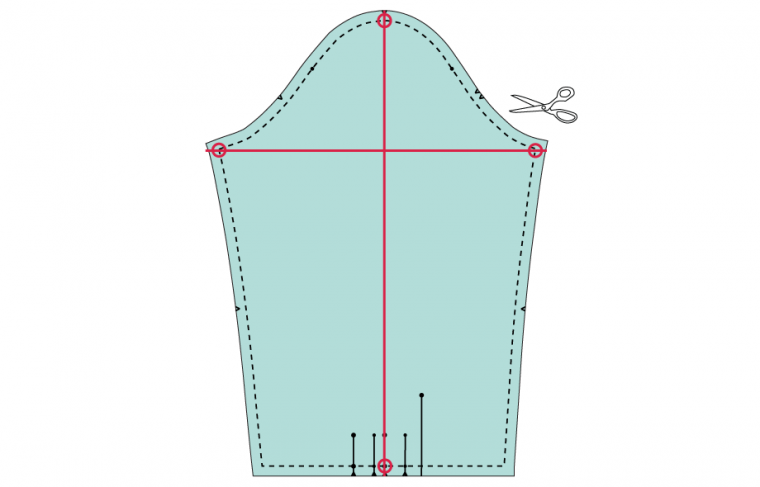
**Step 2:** Once your lines are marked, cut the sleeve into four segments along the two lines you've drawn, but leave the pattern uncut at the points where the lines meet the seam lines. To help visualize this, I’ve indicated with a small circle where you should avoid cutting. These little uncut areas act like hinges, keeping the pattern piece together while allowing you to reshape it slightly.
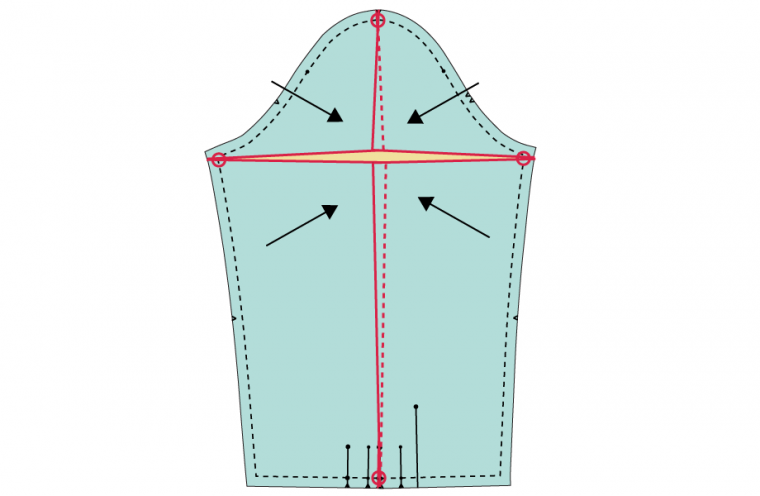
**Step 3:** Now, spread the sleeve to add extra width. As you widen the center of the sleeve to accommodate your arm, the vertical cut will open up, while the horizontal line will cause the top and bottom sections to overlap slightly. This is perfectly fine because the alterations happen within the seam lines, so the overall seam length remains unchanged. The subtle changes you make here will give you more room in the sleeve width.
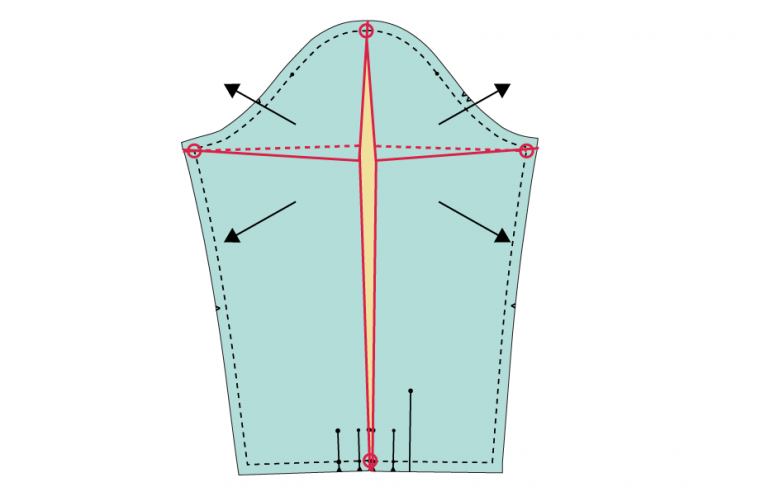
**Step 4:** Once you’ve achieved the desired amount of extra width, tape the adjusted pattern piece onto another sheet of paper to close any gaps and stabilize the pattern. You’ll likely want to redraw the sleeve cap to restore its rounded shape, as the adjustment may have created a sharp corner. Finally, determine the new grainline by folding the sleeve pattern piece in half. Your sleeve is now ready to use!
**Step 5:** If you have particularly slim arms, you can also reduce the sleeve width by overlapping the pieces, as shown below.
I hope this helps!
P.S. If you enjoy customizing patterns and exploring the creative potential they offer, you might find my *Building Block Dress* book interesting. It provides guidance on how to alter patterns to create unique styles or simply tweak existing elements like sleeves or necklines to better suit your preferences.
Tencel Fabric,Tencel Cloth,Pure Tencel Textile,Anti-Static Tencel Textile
Shaoxing Aiyi Textile Co., Ltd. , https://www.aiyitextile.com